 |
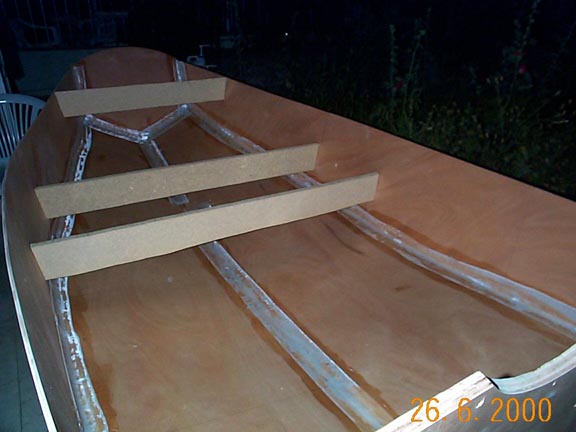
Seams filled from the inside with epoxy fillet and
fiberglass tape applied to the seams. Note the temporary
spreaders (cut from particleboard) at the bulkhead
locations to keep the boat in shape. Dimensions of these
were obtained from the corresponding bulkheads and these
were screwed in place before the point fillets were made
and stitches pulled out. Spreaders do not extend down
fully like the bulkheads thereby making it easier to
fillet the seam and apply fiberglass tape in a continuos
fashion. |
 |
Another view of the boat at this stage. Note that the
fiberglass tape is opaque because it has not been
saturated yet with epoxy. When properly saturated,
fiberglass will become translucent. In bigger boats,
multiple layers of tape is applied to the seams starting
with the narrowest tape and increasing the tape width at
each layer. I applied two layers but conjecture that a
single layer will suffice for the D4. You can either buy
ready-made tape or cut your tapes from the fabric. I cut
5 cm wide tape from the fabric for the inner layer and
used ready-made 75 mm tape for the outer. |
 |
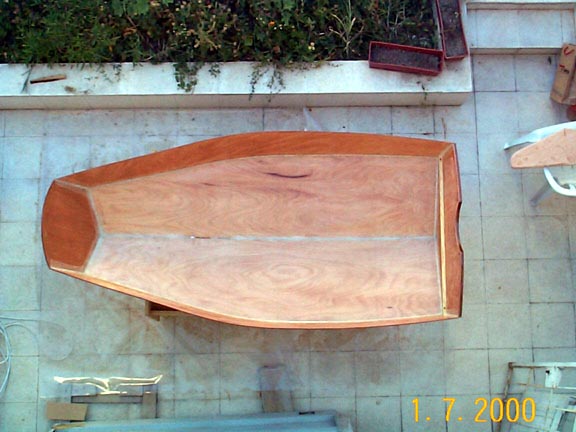
The epoxy has cured now. Notice that the fiberglass
tape is no longer visible. White fillet material at the
inner seams can be seen through the fiberglass tape.
Fillet color is a property of the filler material. I have
used West System Microfibers for this job which makes the
epoxy take a white color when thickened. If the entire
boat is to be varnished, you need to use "wood
flour" or similar additive which gives a wood-like
color to thickened epoxy. |
 |
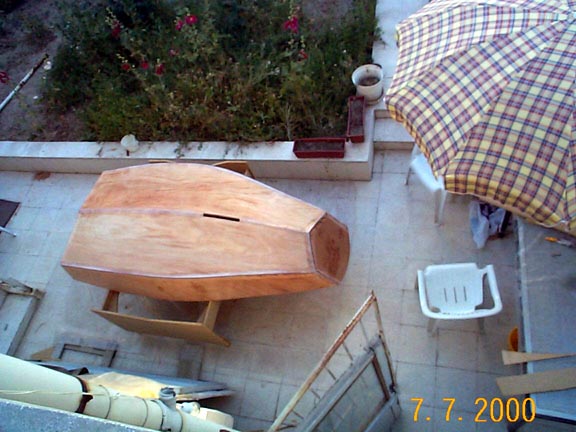
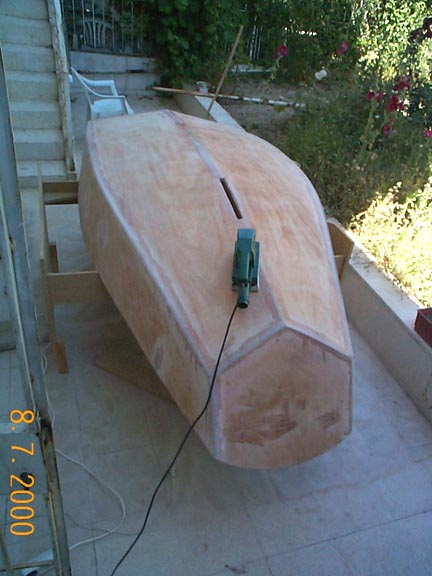
A bird's eye view of the boat from the balcony. You
can remove the temporary spreaders at this stage
(although this is not advisable in bigger boats). Just in
case I get hold of a 2 hp outboard, I have built the
transom 2 cm thick by laminating three 6 mm plywood
layers. |
 |
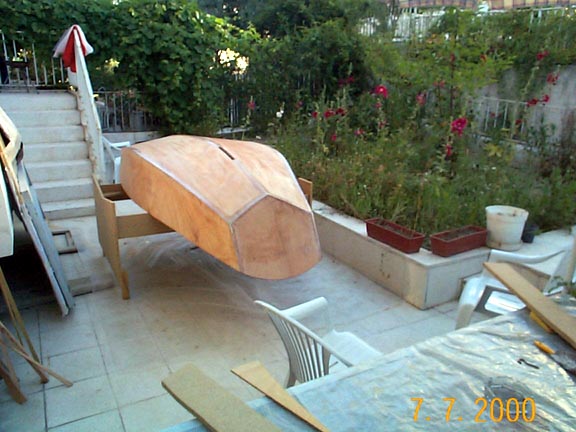
Now it is time to turn the boat over with the help of
an assistant. She is not very heavy yet, but still big
for a man of my size to handle. Before filleting the
seams from the inside, I had applied package tape to the
seams from the outside so that thickened epoxy would not
leak out of the seams. Remember, once cured, epoxy is
very difficult to sand. This did help a lot in obtaining
nice outside edges. Still there were gaps at the seams
when viewed from the outside. |
 |
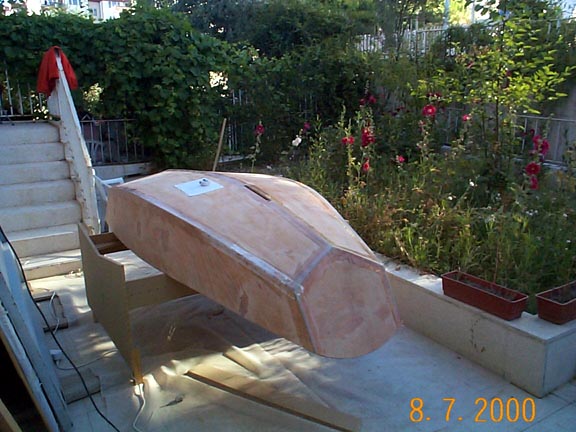
This is inevitable, therefore lightly sand the seams
from the outside first. Then apply fillet material and
fiberglass tape to the seams again, this time from the
outside. This picture and the previous one show the
result after the epoxy has cured. Notice that the
centerboard slot has also been cut at this stage. |
 |
Sanding ... When building a stitch-and glue boat, you
sand, and sand, and sand all the time. Sanding is
necessary if a new coat of epoxy will be applied over
cured epoxy (such as the one at the seams), because the
new coat will not chemically bond with the previous one
once it is cured. Hence, you rely on mechanical grip
only. Sanding the plywood also helps to get better
penetration of the epoxy. In addition, the plywood
surfaces may be contaminated with oils during the
production process and it is a good idea to sand the
plywood before sealing it with epoxy. |
 |
The boat is ready for outside sheathing (which means
covering it with fiberglass fabric and applying a few
coats of epoxy to fill in the weave of the fabric). There
are two methods, the dry method and the wet method for
applying the fabric. The dry method is easier. You first
cover the boat with the fabric (no wrinkles) and apply
enough epoxy to wet it so that it becomes translucent.
You do this by pouring unthickened epoxy over the fabric
and spreading it using a piece of flexible plastic
(called a squegee). Be careful not to trap air bubbles
between the fabric and the plywood. |
 |
This picture shows fiberglass fabric being applied to
the outer surface. The fabric is originally glossy white.
Notice the midsection of the boat where the fabric has
become translucent due to application of epoxy. As you
can see from the picture, the width of the cloth will
rarely be enough to cover the hull, which means you'll
need many pieces of cloth. This is not a bad thing.
First, it allows you to work in more managable chunks.
Second, you must overlap the cloth at the edges of
different pieces to assure full coverage of the hull. If
you are careful enough to do this overlapping at the
seams of the hull you'll get double protection at the
seams. |
 |
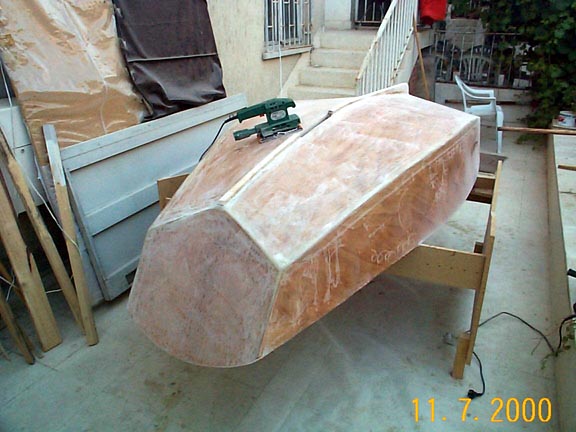
More information can be found in the section on fiberglass fabric and tape.After
covering the entire hull with fabric using as many pieces
as necessary, you must apply at least two layers of
unthickened epoxy to fill in the weave of the cloth and
obtain a smooth surface. It is best to apply these layers
before the previous layer cures to avoid sanding in
between. The picture shows the hull after this procedure
is complete. Note that the surface appears like
varnished, and the fiberglass cloth is not visible. The
dull section at the bow transom is a result of my error.
I had started sanding the hull there when I realized that
I had forgotten to shoot the picture. |
 |
Since the boat will be painted or varnished (more on
this later), you have to sand the surface again for the
paint to get a good grip. Once sanding is complete, you
are through with the outside of the boat until you start
the paint job. It is now time to turn the boat over
again, to install the bulkheads and work on other bits
and pieces which seem trivial, but take a lot of time,
especially in a sailboat. Note that the skeg has also
been glued in place at this stage. |